How to create an action?
Posted on 27/04/2022

First of all, let's define why create actions?
Here the idea is to execute an action when another action is performed.
Let's take an example:
You would like to receive each completed intervention form on an email address so that you can have all the forms in PDF and by email.
To do this, we will define the following action: when an intervention form is completed, it is sent in PDF format to an e-mail address.
Now let's look at the "how? :
Go to the "Actions" tab of the dashboard.

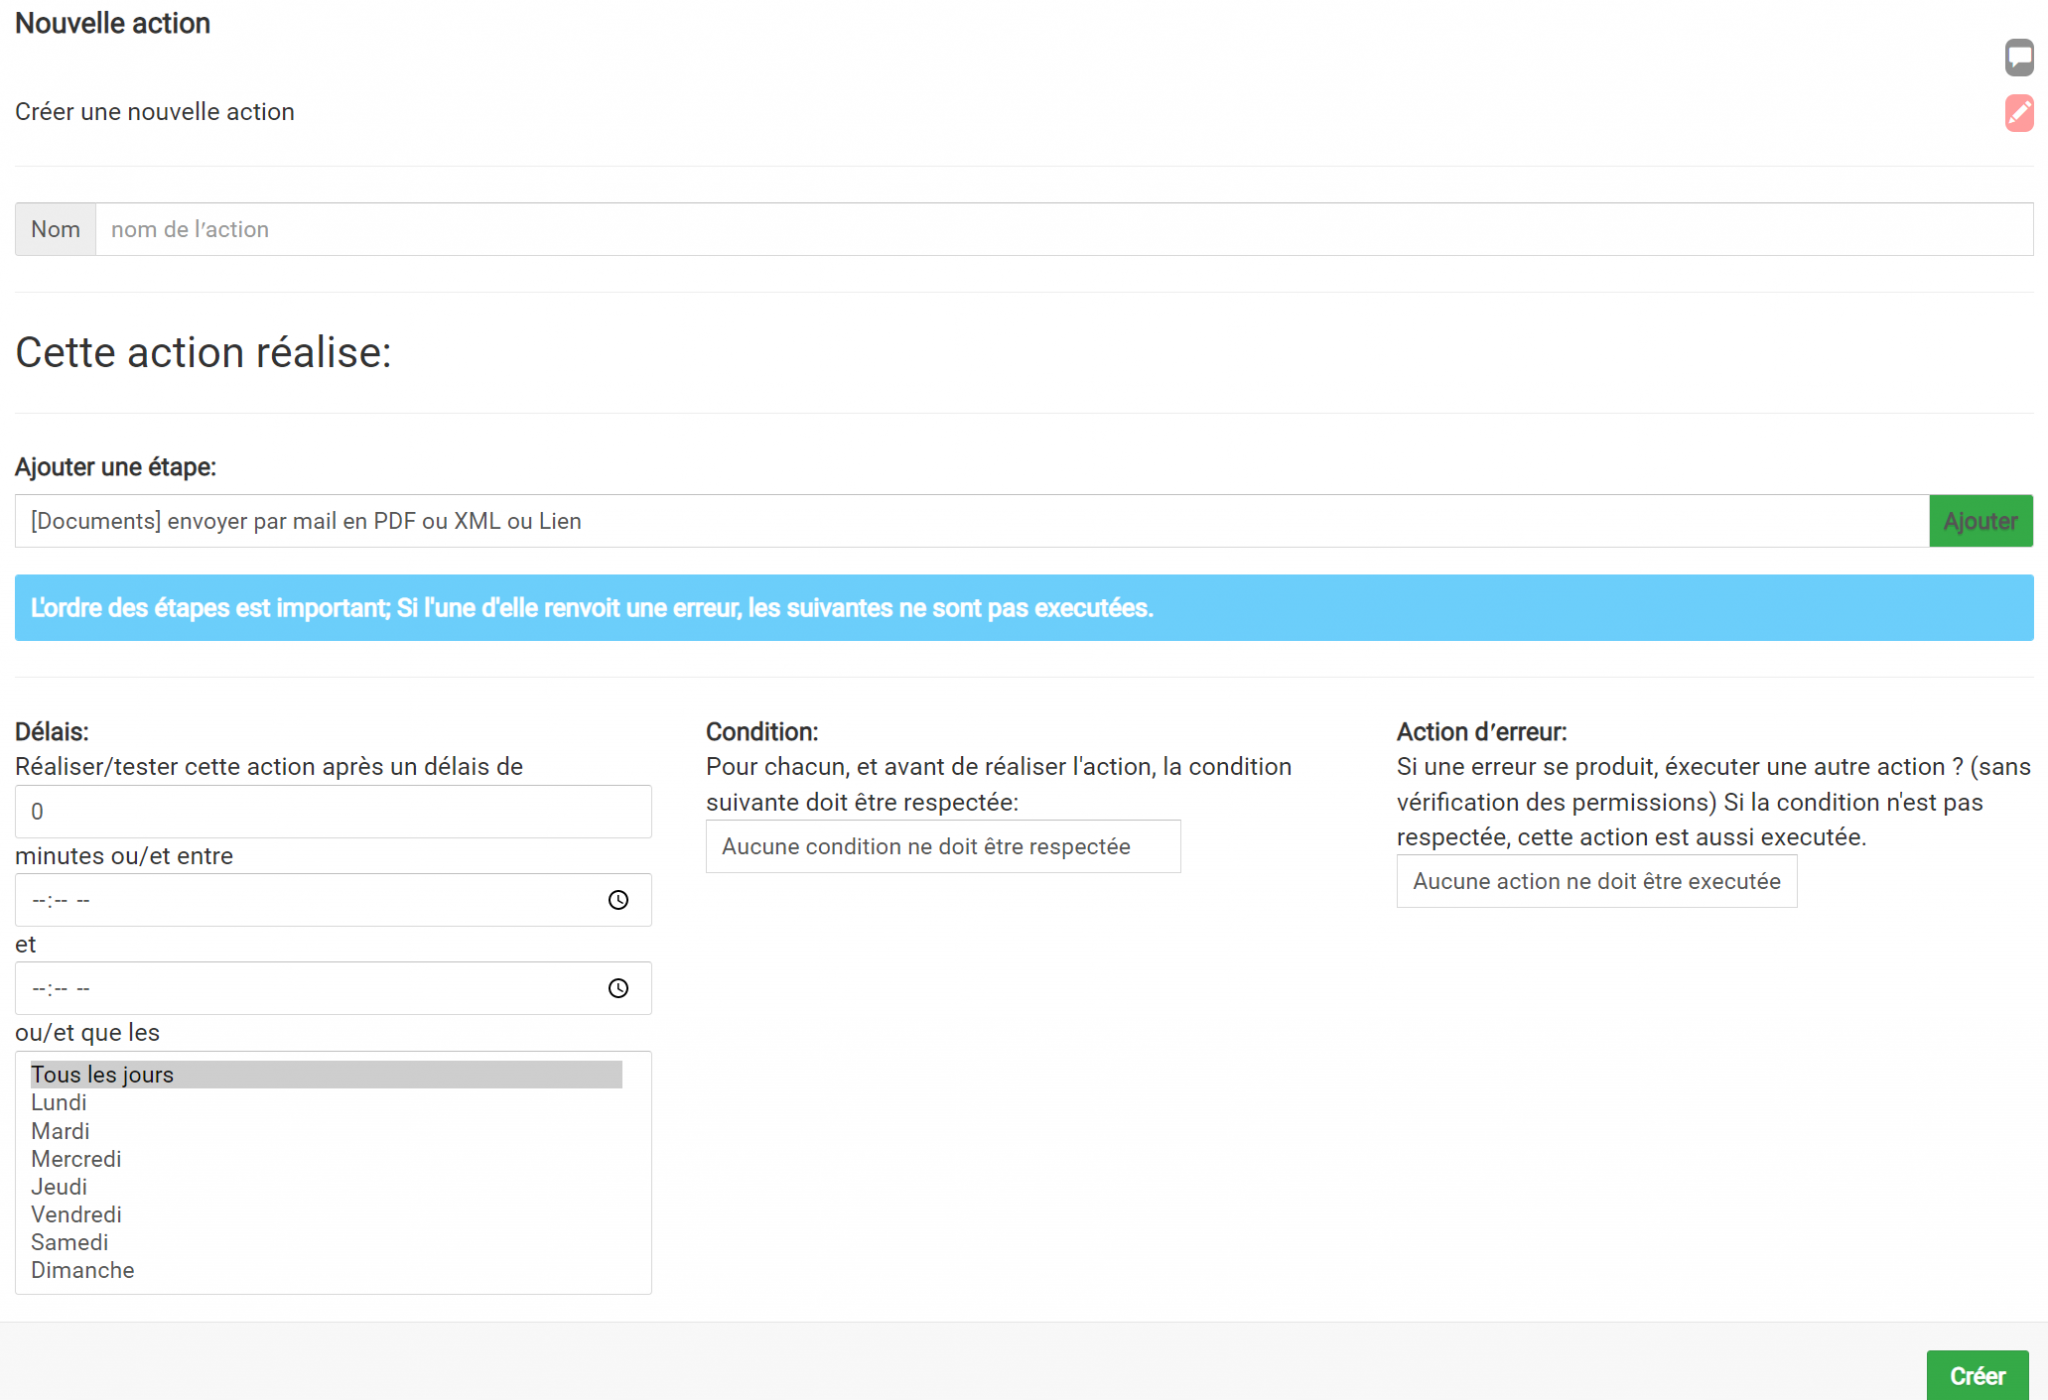
Once on this page, you can click on the blue "New Action" button.
You can then name the action. Under the heading "Add a step:" you can choose which action(s) to perform from the drop-down list, then by pressing the green "Add" button, a new block appears.


At the bottom of the page, you have a choice of options for completing your actions. You can choose the timeframe of the action, certain conditions to be applied or choose an action that would occur in case of an error.
Once this is done, you can create the action with the green "Create" button at the bottom right.
To apply the action to your document, go to the Document section of your dashboard. Then click on "Edit template" and then go to "Automations and access".

On the left hand side of this table you will find the options for the actions. By clicking on the "none" box you will see a list of all the actions you have created.
Categories
Article with no associated category
Posted on 27/04/2022
Posted on 28/04/2022


